Quick Cast-Iron Cinnamon Buns

I may be a fairly neat and organized person, but somehow I’m a disaster when cooking. This morning– since it’s December and apparently that means I must bake all the things– I spontaneously decided to make cinnamon rolls for breakfast. In the process, I managed to knock over a jar of ground cinnamon and spray a good amount of carefully-measured flour out of its mixing bowl… and onto the countertop, down the cabinets, and all over the floor (and my apron).

Gabe walked into the kitchen, took one glance at my mess, and said in his most solemn voice (as if surveying a crime scene), “Ahh, I see a baking has taken place here.”

Indeed. Usually I have a fair amount of time to clean up my messes while waiting for dough to rise/cookies to chill/sauce to thicken/etc. but these cinnamon rolls are magical and only need 30 minutes to rise (!!!) so I had to hustle. In the end, the kitchen was clean, breakfast was on the table, and the only evidence of my mess was a very floury apron hanging on its hook. Until next time.

Quick cast-iron cinnamon buns

•••••••••••••••••••••••••••••••••••••••••••••••••••••••••••••••••••••••

Quick Cast-Iron Cinnamon Buns

Buns

  • 3/4 cup (5 1/2 oz.) packed brown sugar
  • 6 Tbs. granulated sugar, divided
  • 2 tsp. ground cinnamon
  • 1/8 tsp. ground cloves
  • salt
  • 8 Tbs. unsalted melted butter, divided
  • 2 3/4 cups (13 3/4 oz.) all-purpose flour
  • 2 1/2 tsp. baking powder
  • 1 1/4 cups whole milk, warmed
  • 4 tsp. instant yeast

Glaze

  • 3 oz. cream cheese, softened
  • 1 cup (4 oz.) powdered sugar
  • 2 Tbs. unsalted butter, melted
  • 2 Tbs. whole milk
  • 1/2 tsp. vanilla
  • 1/8 tsp. salt

Make filling: In a small bowl, stir together brown sugar, 1/4 cup granulated sugar, cinnamon, cloves, and 1/8 tsp. salt with a fork until well combined. Stir in 1 Tbs. melted butter until evenly distributed. Set aside.

Make dough: In a large bowl, stir together flour, baking powder, and 3/4 tsp. salt until well combined. In a glass measuring cup, whisk together milk, yeast, 2 Tbs. granulated sugar, and 2 Tbs. melted butter until yeast is dissolved. Pour milk mixture into the flour mixture and stir with a wooden spoon or spatula until a rough dough starts to form. Turn out onto a lightly floured surface and knead for about 2 minutes, until the dough forms a smooth ball.

Shape buns: Roll the dough into a rectangle about 9 x 12 inches, with the long side facing you. Brush 2 Tbs. melted butter onto the dough, leaving a 1/2-inch edge on the perimeter unbuttered. Sprinkle the brown sugar mixture on the dough and spread it out evenly with your hands. Press lightly to adhere the mixture to the dough. Roll the dough up tightly away from you to form a 12-inch cylinder. Pinch the ends together, and the seams as well. Use a serrated knife to gently slice the log into 8 equal pieces.

Brush the bottom and sides of a 10-inch cast iron skillet with 1 Tbs. melted butter. Place the cinnamon rolls, cut side down in the skillet, one in the center and seven in a circle around the center. Lightly cover with a piece of plastic wrap and let rise for 30 minutes.

Preheat oven to 350° F. Brush rolls with remaining 2 Tbs. melted butter. Bake rolls on the center rack until golden brown, about 25-30 minutes, rotating pan halfway through baking. Remove from oven and let cool in pan for 10 minutes.

Make glaze: In a small bowl, whisk together glaze ingredients until smooth. Spread over warm rolls and serve immediately.

Source: America’s Test Kitchen.

Lettuce Salad with Pomegranates and Almonds

I’ve been living in Los Angeles for almost a year and a half now, but there are still some differences between California and the Midwest that catch me by surprise, like the types of produce grown in backyards. In Minnesota, my coworkers would bring in homegrown zucchini and tomatoes to share. Here, my coworkers bring meyer lemons, clementines, and figs from their backyards!

Last week I was thrilled to see almost a dozen homegrown pomegranates at my office, free for the taking. I couldn’t even tell you what a pomegranate tree looks like, but I sure do love this tart and juicy fruit. Instead of pumpkins and crunchy leaves, pomegranates are now the signal that lets me know fall is here.

This salad is bright, vibrant, and refreshing, perfect for those warmer-than-usual fall days that seem to abound in September. The hardest part is seeding the pomegranate, which isn’t too difficult if you cut it like this and then pull out the seeds in a bowl of water. Extracting the seeds under water lets the pith rise to the top so you can scoop it away, and it also reduces the likelihood that you’ll squirt your clothing with pomegranate juice, which stains like crazy!

I hope you’re all having a marvelous September!

Lettuce Salad with Pomegranates and Almonds

••••••••••••••••••••••••••••••••••••••••••••••••••••••••••••••••••••••••

Lettuce Salad with Pomegranates and Almonds

Dressing

  • 1 Tbs. freshly squeezed lime juice
  • 3/4 tsp. sugar
  • 1/4 tsp. salt
  • 1/8 tsp. black pepper
  • 2 1/2 Tbs. olive oil
  • 1/2 tsp. dijon mustard

Salad

  • 1 head green leaf or butter lettuce
  • 1/3 cup sliced almonds
  • seeds of one small-to-medium pomegranate

Make the dressing: Whisk together all dressing ingredients. Taste and add more salt and pepper if desired. Set aside.

Prepare the salad: Use a serrated knife to slice the lettuce into bite-sized pieces. Rinse and dry. Toast the almonds by placing them in a small skillet over medium-low heat. Watch the almonds like a hawk and cook, stirring occasionally, until lightly golden brown and fragrant. (This should just take a few minutes.) Set aside to let cool.

Assemble the salad: Place the lettuce in a large bowl. Add dressing to taste and toss. Sprinkle almonds and pomegranate seeds on top.

Serves 4-6.

Source: Adapted from Epicurious

BLT Panzanella

Summer is in full swing around here, as evidenced by my sunburned shoulders (ouch), and I’m trying to enjoy as many summery things as possible before Labor Day. Cookouts, lake trips, outdoor movies, beach days, you name it. Everything is more fun when you’re outside.

That includes eating, of course. Summer food is usually so simple, yet so rewarding. Hamburgers (or veggie burgers), sweet corn, watermelon, anything and everything on the grill. I love when it’s so warm all the time that I actually find myself craving salad!

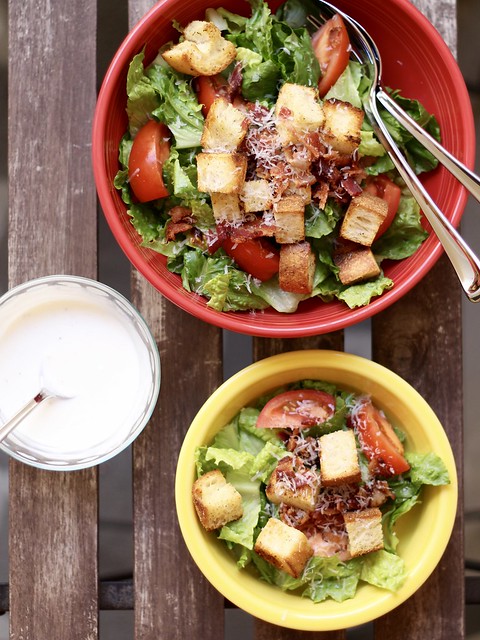
This BLT panzanella is a fun and hearty summer salad that would be a great addition to a picnic, but it can also be a main course on its own. It’s basically a deconstructed BLT in salad form, and it’s on heavy rotation in my meal-planning schedule. Whenever I’m lucky enough to have fresh avocados on hand, I’ll chop one up and throw it on top. Hardboiled eggs are a great addition too.

I hope everyone had a happy and safe holiday weekend! Summer is fleeting, so soak it up while you can!

BLT Panzanella

••••••••••••••••••••••••••••••••••••••••••••••••••••••••••••••••••••••••

BLT Panzanella

Salad

  • 2 Tbs. unsalted butter
  • 1 small baguette, cubed (the cubes should be crouton-size, or about 1-inch square)
  • salt
  • pepper
  • 6 oz. bacon
  • 1 heart of romaine, chopped, rinsed, and dried
  • 2-3 medium tomatoes, sliced into wedges
  • 1/3 cup freshly grated parmesan

Dressing

  • 3 Tbs. Greek yogurt
  • 3 Tbs. buttermilk or half and half
  • 1 clove garlic, minced
  • juice of 1/2 a lemon
  • salt
  • pepper

Preheat oven to 425° F. Melt the butter in a large microwave-safe bowl. Add the cubed baguette and toss to coat. Sprinkle with salt and pepper to taste. (My go-to spice blend for croutons is Penzey’s sandwich sprinkle, but plain old salt and pepper works just fine.) Transfer the croutons to a rimmed baking sheet lined with parchment paper or foil. Bake for about 10 minutes, tossing halfway through, until evenly browned and crunchy. Set aside to cool.

Meanwhile, place the bacon in a large nonstick frying pan or griddle and place over medium-low heat. Cook, turning occasionally, until bacon is browned and crisp. Transfer to a paper-towel-lined plate and let cool.

To make the dressing: In a small bowl, whisk together yogurt, buttermilk, garlic, and lemon juice. Stir in salt and pepper to taste.

To assemble the salad, toss together romaine, tomatoes, croutons, bacon, and parmesan cheese. Serve with dressing on the side.

Source: Annie’s Eats.

Tips for Successful Meal-Planning

I’ve had a few of my coworkers ask me how I manage to bring a lunch from home every day instead of going out to buy lunch, and the short answer is… leftovers.  But the long answer is that I don’t want to spend $200 a month on lunches when I like the taste of my own food more. There you have it, folks: the key to lunchtime is being stingy and snobby. ;)

But for real, the easiest way to get enough leftovers for lunches is to cook meals at home for dinner. I feel like I’ve become pretty adept at meal-planning, so I thought I’d share some tips. You don’t have to have an excel spreadsheet with 356 (and counting) recipes on it in order to become a meal-planning pro. But you do need a little time and energy, and a commitment to home cooking.

I recently started paying a little extra to use the meal-planning function on my favorite grocery list app (AnyList*) but you don’t need a fancy app to get started. Any place you want to write down your plan for the week is fine. So here are my tips:

  1. Organize your recipes. It’s helpful to have a catalog of recipes you’ve tried and loved. This could be an excel spreadsheet, a Pinterest board, or an old-fashioned recipe box. (Or if you’re me, all three.) It’s also nice to keep track of recipes you want to try in the future; I keep a Pinterest board as well as a list in my phone. If I’m browsing through cookbooks and spot something that looks tasty, I type it in my phone along with the cookbook name and page number. That way, when I’m really stumped and can’t think of anything to make, I have a bunch of new recipes at my fingertips that will inspire me to cook again.
  2. Constraints can be liberating. There are millions of recipes in cookbooks and millions more on the internet. Sitting down on a Sunday afternoon and knowing you can cook anything in the week ahead is a little overwhelming. Constraints are key. We get a box of vegetables and fruit each week from our CSA, so I start there. If I’m getting zucchini, Swiss chard, potatoes, and spinach, I look for recipes that use those ingredients. You can also focus on what’s on sale at the grocery store, or ingredients you need to use up that are already in your fridge or pantry. Either way, limiting your options can actually help you plan more quickly.
  3. Look to the calendar. After knowing what recipes I want to make, I look over the activities and events that are coming up in the week ahead. Dinner with the in-laws on Sunday? No need to cook! The hubby has to work late on Thursday? Then I’ll have cheese and crackers for dinner. (Real life, right?)
  4. Pay attention to recipe yields. Since there are only two of us, I expect to eat leftovers for lunch and sometimes dinner. So I space meals out based on how much food they make. If a recipe only makes enough servings for dinner and lunch the next day, then I know I’ll have to cook the following night. But if a recipe makes a ton of servings, I can work those leftovers into the dinner plan as well.
  5. Make a plan and write it down. Like I said, I use AnyList to plan my meals for the week. I love it because I can easily save recipes from the web or manually enter them into the app from my cookbooks. From there, I assign recipes to a certain day on the calendar and then seamlessly add the ingredients I need to my grocery list. But I also go old-school and write the weekly plan on a chalkboard on the fridge, so both of us know what’s for dinner each night. (Pro tip: The wonderful thing about using an app or calendar to meal-plan is that I can always answer the age-old question, “How long has this been in the fridge?”)
  6. Be flexible. The other night I got home and realized that the root vegetable gratin I had planned to make for dinner required two hours in the oven. Oops. (I guess another tip is read recipes all the way through first…) So I decided to switch it up and make the pasta dish that I had planned for a different night instead. Sometimes I have to work late, or coworkers want to go out for a spontaneous happy hour. Just relax and go with the flow.
  7. Make meal-planning part of your routine. I plan our weekly meals every Sunday morning. It can take 30 minutes, or close to an hour, but I still carve out the time. Sometimes even I grumble about this task, but I have to admit that a little advance planning makes our week a whole lot smoother. And more delicious too.

Tips for Successful Meal-Planning

Tips for Successful Meal-Planning

* This post is not sponsored in any way. I’ve just had a really great experience with AnyList and wanted to share that with you!

Poblano Peppers Stuffed with Corn Risotto

After a year of living in Los Angeles, I’m still a little bit confused by the seasons. (Yes, we have seasons here.) I was all settled into a routine of eating apples with my granola and yogurt every morning, and suddenly my CSA started delivering peaches, nectarines, and apricots. I frantically checked the calendar. Had I overslept and missed May and June?

Nope, it’s still May, and I’m already crying over how much zucchini is getting delivered to my apartment. (Please send zucchini recipes my way.) I have to stop saying “knee high by the Fourth of July” because we already have sweet corn too. I will admit, it’s not as good as the Midwestern variety, but it’ll do. Summer seems to be here already, even if the calendar says spring.

And yet, I had a little twinge of sadness the other day when I remembered how delightful spring in Minnesota could be. Those heady days of sunshine and snowmelt, when it feels like everyone, even the earth itself, is letting out a sigh of relief. I would grin like a crazy person at the thought of wearing a skirt or ballet flats. I wanted nothing more than to eat my lunch outside and spend lengthy evenings sitting on the balcony, sipping margaritas.

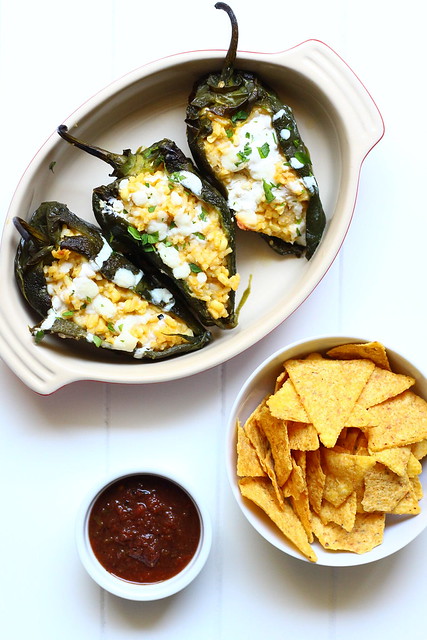
So for those of you who are scattered throughout the rest of the country, waking up to the delights of springtime, here’s a recipe to enjoy with your balcony margaritas. Kernels of sweet corn are folded into a creamy risotto and then stuffed inside roasted poblano peppers. This recipe is warm enough for those still-cool nights, but the flavors will transport you right into summer, wherever you are.

Poblano Peppers Stuffed with Corn Risotto

Poblano Peppers Stuffed with Corn Risotto

••••••••••••••••••••••••••••••••••••••••••••••••••••••••••••••••••••••••

Poblano Peppers Stuffed with Corn Risotto

  • 8 large poblano peppers
  • 6 cups chicken or vegetable stock
  • 2 Tbs. olive oil
  • 1 small onion, chopped
  • 1 garlic clove, minced or pressed
  • 2 cups arborio rice
  • 1/2 cup light beer
  • 1 1/2 cups fresh corn kernels (from about 2 cobs; can also use frozen corn that’s been thawed)
  • 3/4 cups freshly shredded Monterey jack cheese
  • kosher salt
  • freshly ground black pepper
  • 1/4 cup crumbled queso fresco or cotija cheese
  • 3 Tbs. sour cream
  • 1 Tbs. milk
  • 3 Tbs. freshly chopped parsley or cilantro

Roast the peppers: You can do this by cooking them on a baking sheet under a broiler, turning every few minutes, until the skins blister. Or, you can roast the peppers on a gas stove by placing them directly on the burner racks with the flame on medium-high, turning every so often until the skins are blistered. On the stove, it takes about 5 minutes for each pepper, so the broiler method is a bit quicker. Transfer the peppers to a bowl and cover the bowl with plastic wrap. Set aside so they can cool slightly.

Heat the stock to a low simmer in a medium saucepan. Turn the heat to low, just to keep the stock warm.

Heat the olive oil in a large saucepan over medium heat until shimmering. Add onion and cook until softened, about 8 minutes. Add the garlic and cook until fragrant, about 1 minute. Stir in the rice and cook for 1-2 minutes. Pour in the beer and scrape up any brown bits on the bottom of the pan. Cook for about another minute, until the beer is mostly absorbed.

Ladle 1 cup of the warm stock into the rice mixture and simmer, stirring frequently, until the stock is absorbed. Repeat with the remaining stock, about 1/2 cup at a time. Stir in the corn with the final 1/2 cup of stock. The total cooking time for the risotto is about 30 minutes, and it will be thick and creamy when done, and the rice should be tender. Stir in the Monterey jack cheese, 1/2 tsp. salt, and a few grinds of black pepper. Taste and adjust the seasoning as desired. Remove from heat.

Preheat oven to 400° F. Uncover the chiles and gently rub off the skins. Carefully slice a lengthwise slit in one side of each chile and pull out the seeds and membranes. Don’t worry about it being perfect, just do the best you can. Stuff each poblano with some of the risotto and arrange in a baking dish. Sprinkle with crumbled queso fresco and bake for 10-15 minutes, until lightly browned on top.

Meanwhile, whisk together sour cream and milk in a small bowl, along with a pinch of salt. Drizzle over the peppers and sprinkle with parsley. Serve immediately.

Source: The Smitten Kitchen Cookbook.

Butternut Squash, Kale, and Wild Rice Gratin

Oh kale. You poor thing. First, you were a modest dietary staple. Then people kind of forgot about you because food scientists started inventing magical food like cheese puffs. But wait! You rose from obscurity to become obscenely trendy. Of course, your hipsterific popularity made it inevitable that you would eventually become a punchline.

(Exhibit A: What vegetable do only rich people eat? Upskale.)

Now that we got that history lesson out of the way, here’s yet another kale recipe. I know. Bear with me. The problem is that I get kale delivered practically every week nowadays, so I have to come up with interesting ways to eat it. Being a native midwesterner, I turned my latest bunch of kale into a hotdish, minus the tater tots and tuna-noodles.

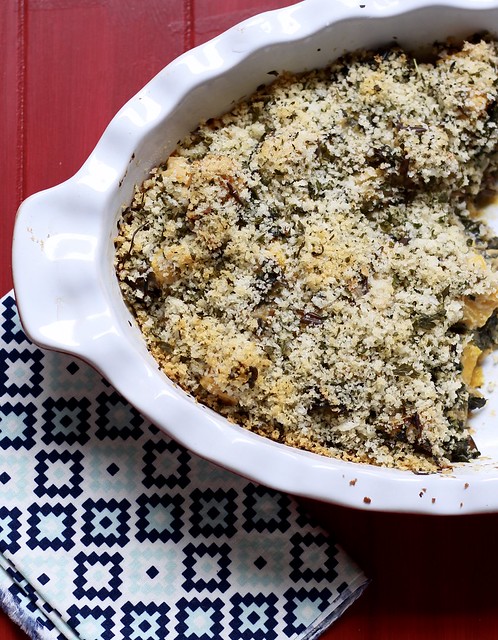
First I cooked the kale with onions, garlic, and butternut squash until the veggies were soft. Then I tossed in some cooked wild rice and stirred in a creamy homemade cheese sauce, using gruyere and comté because I’m fancy like that. I also had parsley from my CSA box so I added that to the breadcrumb topping. As it emerged from the oven, the final dish was a cheesy, nutty, indulgent yet vegetable-packed meal that let me conquer one more week’s worth of kale. Victory was mine! Until next time.

Butternut squash, kale, and wild rice gratin

••••••••••••••••••••••••••••••••••••••••••••••••••••••••••••••••••••••••

Butternut Squash, Kale, and Wild Rice Gratin

  • olive oil
  • 1 large onion, chopped
  • 1 small butternut squash (about 1.5 lbs), peeled and cut into 1-inch pieces
  • 2 cloves garlic, minced
  • 8 oz. bunch of curly kale, stemmed and roughly chopped into 2-inch pieces
  • 2 cups cooked wild rice
  • 2 Tbs. butter
  • 2 Tbs. flour
  • 1 1/4 cup whole milk
  • 1 cup freshly shredded gruyere cheese
  • 1/2 cup freshly shredded comté cheese
  • kosher salt and freshly ground pepper
  • 1/2 cup panko
  • 2-3 Tbs. chopped fresh parsley

Heat oven to 400° F. Butter a 2-quart casserole dish and set aside.

Heat 2 Tbs. olive oil in a dutch oven over medium heat. Add the onion, squash, garlic, and kale, and sauté until vegetables are tender, about 15-20 minutes. Remove from heat and stir in the wild rice.

Meanwhile, melt butter in a 2-quart sauce pan over medium heat. Add flour and stir for about 1-2 minutes, until it’s a light golden color and forms a thick paste. Slowly whisk in milk and keep stirring until the mixture thickens slightly. Remove from heat and whisk in gruyere and comté until melted. Stir in 3/4 tsp. kosher salt and a few grinds of black pepper.

Pour the cheese sauce over the vegetable/rice mixture and stir until evenly coated. Taste the mixture and add additional salt and pepper if desired. Transfer mixture to the prepared casserole dish.

In a small bowl, stir together 1 1/2 tsp. olive oil, panko, and parsley. Season with salt and pepper to taste. Evenly sprinkle mixture over the casserole. (You might not need all the topping.)

Bake at 400° F for 20-25 minutes, or until mixture is bubbling and the top is golden brown.

Source: A Lingonberry Jam original, inspired by The Well-Cooked Life and Smitten Kitchen.

Miso-Sesame Salad Dressing

I suppose it only makes sense to follow a cookie recipe with a salad recipe. Or rather a salad dressing recipe. You guys have already seen a couple of recipes on this blog from America’s Test Kitchen’s “The Complete Vegetarian Cookbook.” It has quickly become one of my absolute favorite cookbooks as well as my chief partner in meal planning.

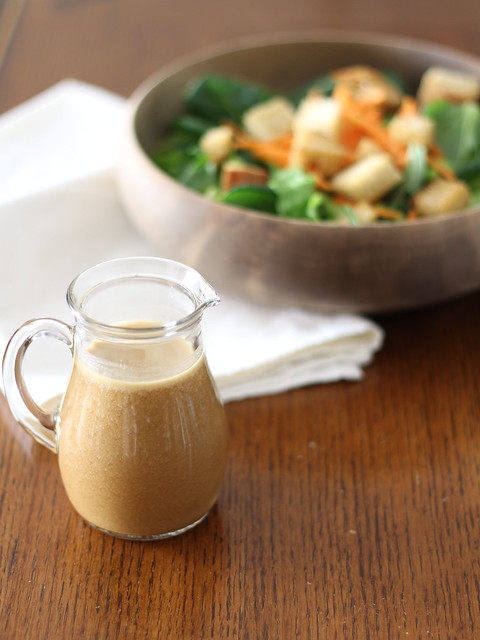
Each week, we get a box of local produce delivered by our CSA. (All winter long! Pinch me!) After sorting through the offerings, I usually flip to the index of this cookbook and decide what meals I want to make for the week. I almost always receive some sort of heirloom lettuce, which gets to be tiresome week after week. So I’ve been working my way through various salad dressing recipes. This miso-sesame dressing has emerged as a favorite so far. It’s savory and salty and garlicky and gingery, and I had to hold myself back from eating it by the spoonful because that’s embarrassing, right?

Given the flavor profile, this dressing goes well with Asian-inspired salad ingredients. I tossed it with a mixture of butter lettuce and tatsoi, carrots, edamame, green onions, and some homemade sesame-crusted croutons. And then I ate it pretty much every day for a week. So good.

Miso-sesame salad dressing

••••••••••••••••••••••••••••••••••••••••••••••••••••••••••••••••••••••••

Miso-Sesame Dressing

  • 6 Tbs. water
  • 1/4 cup rice vinegar
  • 7 tsp. red miso paste*
  • 1 Tbs. soy sauce
  • 1 1/2 tsp. honey
  • 2 Tbs. grated fresh ginger
  • 1 garlic clove, minced
  • 2 Tbs. neutral-tasting oil (I used sunflower seed oil)
  • 1 Tbs. toasted sesame oil

Place water, vinegar, miso, soy sauce, honey, ginger, and garlic in a blender and blend until the mixture is well combined, about 15 seconds. Add oils and blend until the oils are incorporated and the dressing is smooth, about 15 seconds.

Makes about 1 cup.

Dressing can be made ahead and refrigerated for up to 1 week.

Source: Slightly adapted from America’s Test Kitchen “The Complete Vegetarian Cookbook.”

* I couldn’t find miso paste at my regular grocery store, so I ordered it online. There are several different types of miso paste so make sure you get the red one; it has a much deeper flavor. Don’t worry if it comes in a large container; the stuff lasts forever in the fridge. Plus, you can always make miso brown rice cakes!