Lettuce Salad with Pomegranates and Almonds

I’ve been living in Los Angeles for almost a year and a half now, but there are still some differences between California and the Midwest that catch me by surprise, like the types of produce grown in backyards. In Minnesota, my coworkers would bring in homegrown zucchini and tomatoes to share. Here, my coworkers bring meyer lemons, clementines, and figs from their backyards!

Last week I was thrilled to see almost a dozen homegrown pomegranates at my office, free for the taking. I couldn’t even tell you what a pomegranate tree looks like, but I sure do love this tart and juicy fruit. Instead of pumpkins and crunchy leaves, pomegranates are now the signal that lets me know fall is here.

This salad is bright, vibrant, and refreshing, perfect for those warmer-than-usual fall days that seem to abound in September. The hardest part is seeding the pomegranate, which isn’t too difficult if you cut it like this and then pull out the seeds in a bowl of water. Extracting the seeds under water lets the pith rise to the top so you can scoop it away, and it also reduces the likelihood that you’ll squirt your clothing with pomegranate juice, which stains like crazy!

I hope you’re all having a marvelous September!

Lettuce Salad with Pomegranates and Almonds

••••••••••••••••••••••••••••••••••••••••••••••••••••••••••••••••••••••••

Lettuce Salad with Pomegranates and Almonds

Dressing

  • 1 Tbs. freshly squeezed lime juice
  • 3/4 tsp. sugar
  • 1/4 tsp. salt
  • 1/8 tsp. black pepper
  • 2 1/2 Tbs. olive oil
  • 1/2 tsp. dijon mustard

Salad

  • 1 head green leaf or butter lettuce
  • 1/3 cup sliced almonds
  • seeds of one small-to-medium pomegranate

Make the dressing: Whisk together all dressing ingredients. Taste and add more salt and pepper if desired. Set aside.

Prepare the salad: Use a serrated knife to slice the lettuce into bite-sized pieces. Rinse and dry. Toast the almonds by placing them in a small skillet over medium-low heat. Watch the almonds like a hawk and cook, stirring occasionally, until lightly golden brown and fragrant. (This should just take a few minutes.) Set aside to let cool.

Assemble the salad: Place the lettuce in a large bowl. Add dressing to taste and toss. Sprinkle almonds and pomegranate seeds on top.

Serves 4-6.

Source: Adapted from Epicurious

Caramel Apple Tart

Okay, I promised you a recipe that uses that homemade caramel sauce I wrote about, and then I teased you all mercilessly by giving you a salad instead. My bad. So here’s the dessert you’ve been waiting for. Because despite the evergreen boughs and chocolate advent calendars that are popping up around here– not to mention the cloyingly cheerful rendition of “Sleigh Ride” that made me stomp out of a clothing store in disgust yesterday– it is still technically fall. And this caramel apple tart would be happy to sit close to the center of your Thanksgiving dessert table. (No matter what, pumpkin pie gets the starring role. Tradition.)

This dessert features my new favorite tart crust: a super simple, no rolling necessary, easy-breezy-in-the-food-processor crust from America’s Test Kitchen. (This crust is also delightful for savory dishes by taking out the sugar and using whole wheat pastry flour.) Cover the pre-baked crust with a layer of tart apples, then a crumbly oatmeal streusel topping, and finish it off with a drizzle of that delectable caramel. Lo and behold, you get something that looks fancy but doesn’t require you to break a sweat. So you can save that energy for wrestling your Thanksgiving turkey, and then relax by gobble gobbling this dessert right up.

Caramel apple tart

Caramel apple tart

Caramel apple tart

Caramel apple tart

Caramel apple tart

••••••••••••••••••••••••••••••••••••••••••••••••••••••••••••••••••••••••

Caramel Apple Tart

Crust

  • 1 1/4 cups all-purpose flour
  • 1 Tbs. sugar
  • 1/2 tsp. salt
  • 8 Tbs. unsalted butter, chilled and sliced into 1/2-inch cubes
  • 3 Tbs. ice water

Filling

  • 2 Tbs. flour
  • 2 Tbs. granulated sugar
  • 1 tsp. cinnamon
  • 1/8 tsp. nutmeg
  • 1 lb. granny smith apples (about 2-3 large or 4-5 small)

Topping

  • 1/2 cup rolled oats
  • 1/3 cup brown sugar
  • 1/4 cup flour
  • 1/4 tsp. cinnamon
  • 1/4 cup (4 Tbs.) cold unsalted butter, cut into 1/2-inch cubes
  • homemade or store-bought caramel sauce, to taste

Preheat oven to 375° F.

Make the tart crust: Add flour, sugar, and salt to the bowl of a food processor. Pulse a few times until well-combined. Add butter and pulse about 15 times, until the mixture resembles a coarse cornmeal. Add ice water and pulse again for a few seconds, until the mixture comes together and no longer looks powdery.

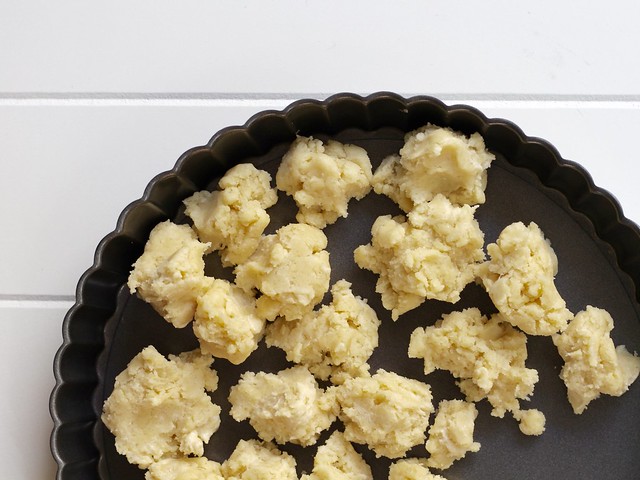
Line the bottom of a 9-inch round tart pan with walnut-sized balls of the tart dough. Use your hand to gently press the dough into the bottom and up the sides of the pan, filling in any cracks and smoothing it as best you can. Press your thumb against the top of the pan to even out the top of the crust. Place a sheet of plastic wrap over the dough and smooth it out one more time. Place tart pan on a plate and put it in the freezer for 30 minutes, until solid.

Remove the tart pan from the freezer and place it on a baking sheet. Cover the crust with a double layer of aluminum foil, and place dried beans or pie weights on top of the foil. Bake until golden brown, about 30 minutes, rotating halfway through. Remove from oven and place on a cooling rack to cool.  Reduce oven temperature to 350° F.

Make the filling: In a medium bowl, whisk together flour, sugar, cinnamon, and nutmeg. Peel and core the apples and evenly slice them, about 1/4- to 1/8-inch thick. Toss them in the bowl with the flour mixture until they’re evenly coated. Layer them evenly in the pre-baked tart shell.

Make the topping: In a small bowl, whisk together the oats, brown sugar, flour, and cinnamon. Use a pastry blender or two knives to cut in the butter until the mixture is crumbly and well-combined.

Assemble the tart: Evenly sprinkle the oat topping over the tart. Bake at 350° F for 30-35 minutes, or until the topping is golden brown. Let cool at room temperature, then drizzle some caramel sauce over the whole thing. Slice and serve.

Store tart in the refrigerator, covered with plastic wrap.

Serves 8-12.

Source: Tart crust from America’s Test Kitchen. Filling and topping from Sally’s Baking Addiction.

Plum Torte

Gabe and I just got back from our honeymoon at last: a whirlwind trip to London and Paris! We also celebrated our one-year anniversary and Gabe’s completion of the California Bar Exam, so we killed three birds with one stone.

Speaking of stones, I spent the weeks before our trip practically swimming in stone fruit. Peaches, plums, nectarines, you name it! I ate most of it raw, but sometimes it was just a wee bit too much to handle. So I turned it into dessert.

This plum torte recipe from the New York Times is quite famous but new to me. It’s a great way to use up a bounty of summer fruit. Shortly before we left for Europe, I gave it a whirl, baking an assortment of 10 plums into a delightful torte.

And then just a mere week later, I saw a very similar cake at one of Ottolenghi’s  London delis. So I ordered a ginormous slab of it and ate the entire thing while sitting on a patch of grass outside Buckingham Palace. I could barely move afterwards, but it was totally worth it. Gotta catch that summer stone fruit while you can!

Plum torte

Plum torte

Plum torte

Plum Torte

  • 1 cup all-purpose flour
  • 1 tsp. baking powder
  • pinch of salt
  • 2/3 cup granulated sugar
  • 1/2 cup unsalted butter, softened
  • 2 large eggs
  • 12 small plums (or 8-10 larger ones), halved and pitted
  • 1 tsp. cinnamon mixed with 1 Tbs. sugar

Preheat oven to 350° F. In a small bowl, whisk together flour, baking powder, and salt. Place granulated sugar and butter in the bowl of a stand mixer fitted with the paddle attachment. Mix on medium-high speed until light and fluffy, about 2-3 minutes or so. Add the eggs one at a time, and mix on medium speed (scraping the bowl occasionally) until well combined. Add the dry ingredients and mix on low until just combined. The batter will be thick.

Transfer batter to a 9-inch springform pan and spread it out evenly. Gently press the plum halves into the batter. Sprinkle the cinnamon sugar mixture over the top. If your springform pan has a tendency to leak, place it on a large jellyroll pan. Bake the cake until a toothpick inserted in the cake (not inserted into a plum) comes out clean, about 50-60 minutes.

Remove from oven and let cool on a rack. Serves 8-12.

Source: Very slightly adapted from Marian Burros and the New York Times via Smitten Kitchen.

Patriotic Popsicles

Happy July, everyone! We’re getting ready to head up to Carmel Valley tomorrow for the wedding weekend extravaganza for some dear friends of ours. And since it’s the Fourth of July, we get to celebrate both wedded bliss and ‘Murica. Talk about fireworks.

If you’re feeling inspired to celebrate the good old USA by making frozen treats this weekend, here’s a fun and fairly simple project. I couldn’t resist. Because summer = popsicles, and the Fourth of July = red, white, and blue food.

This recipe is more of a technique than an actual recipe. Feel free to adjust it to fit your own taste preferences and the size of your popsicle molds. One thing I have to mention: for each pouring step, be very careful to fill the molds from the center so you don’t drip any puree on the insides– or you’ll get messy-looking popsicles. Of course, they’ll get messy when they melt (see exhibit A below), but hey, that’s part of the fun! Hope you all have a wonderful Fourth of July!

Patriotic popsicles

Side note: Those of you who know me well understand that two of my least favorite things are being cold and being sticky. Taking this photo was a true labor of love. ;)

Patriotic Popsicles

  • 1/2 pint blueberries
  • 1 cup greek yogurt
  • milk
  • 12 oz. strawberries
  • honey, to taste

In a blender or food processor, puree blueberries until smooth. Taste and add honey if desired. (Remember, things taste more tart once they’re frozen!) Pour equal amounts of the blueberry puree into popsicle molds, filling the bottom third or so of the molds. Freeze until firm.

In a small bowl, stir together greek yogurt and a tablespoon or two of milk until it’s a good pouring consistency. Stir in honey to taste. When the blueberry layer of popsicles is frozen solid, cover it with a short layer of greek yogurt mixture, maybe half an inch or so depending on the size of your molds. Refrigerate remaining yogurt mixture and freeze popsicles until firm.

In a blender or food processor, puree strawberries until smooth. Stir in honey if desired. Pour a layer of strawberry puree into the popsicle molds over the frozen greek yogurt layer. (Keep them close to the same size to resemble the stripes on the flag.) Place tinfoil over the tops of the popsicle molds and insert popsicle sticks. (The foil helps them stay in place.) Freeze until firm.

Finish the popsicles by adding one more layer of greek yogurt and one final layer of strawberry puree, freezing between each step. Once the popsicles are frozen solid, they’re ready to serve. Release from popsicle molds by carefully running hot water over the molds until they loosen.

Makes six three-ounce popsicles.

Source: Oh the Things We’ll Make.

Blood Orange Margarita

Happy Pi Day everyone! Unfortunately, as you may have guessed from the title of this post, I’m not here to share a pie recipe with you. I am in fact in the middle of making this delightful-looking pie from Smitten Kitchen, but I’ll just link to that recipe in case you’re feeling particularly pie-ish.

Nope, I’m here to share a different recipe with you. Because not only is it Pi Day, it is an incredibly, unseasonably warm 60+ degrees in Minneapolis right now. I’m celebrating the fact that all our windows are open and I just finished cleaning off our patio furniture. In March. Awesome.

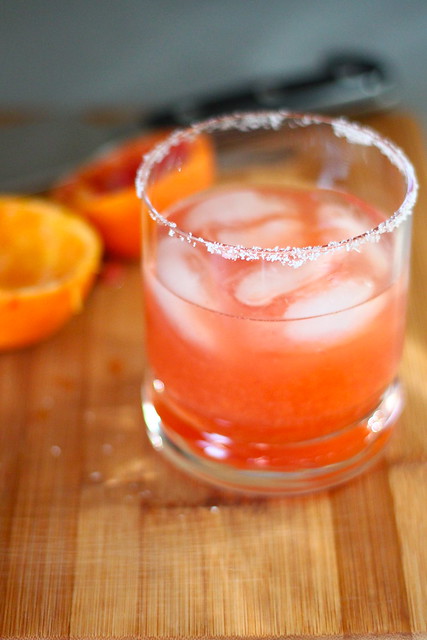
How am I celebrating, might you ask? With a blood orange margarita. Bright, tangy citrus fruits are one of the things that cheer me up in the middle of winter, and blood oranges are one of my favorites. Their growing season is slowly tapering off right now, so making a summery margarita seemed to be the perfect way to say goodbye to winter and hello to this early spring. And, since people are thinking a lot about math today, margaritas also have one of the easiest drink ratios ever– 3:2:1. Cheers!

Blood orange margarita

Blood Orange Margarita

  • 3 oz. freshly squeezed blood orange juice (from 1-2 blood oranges)
  • 2 oz. tequila
  • 1 oz. triple sec
  • kosher or coarse sea salt, for the rim

Rub the rim of a glass with the cut half of a blood orange. Sprinkle some salt on a plate and gently dip the rim of the glass in the salt. Place a handful of ice in the glass and set aside.

Combine blood orange juice, tequila, and triple sec with additional ice in a cocktail shaker. Strain over the ice in your glass. Serve.

Yield: One delicious margarita.

Source: White on Rice Couple

Piña Colada Sherbet

You guys have probably noticed that the blog has been a bit quiet lately. Um… I haven’t actually posted since May. Uffda. Starting a new job and planning a wedding has kept me pretty busy, but I also just haven’t been cooking very many new, exciting, “blog-worthy” things.

You’d think that joining a CSA for the first time would lead to a lot of new recipes, but most days I just come home and eat vegetables for supper. One night I just had half a cabbage. It was deliciously braised in olive oil and butter with new potatoes and fresh onions, but still, cabbage. Definitely getting in touch with my Polish ancestors. ;)

All these local, organic vegetables that I pick up every week are gloriously fresh and don’t need much more than a quick sauté, so that’s been my summer. Simple, easy, instinctive cooking rather than meal-planning and poring over new recipes. It’s kind of refreshing. I’m sure once fall starts up again and Gabe is home, I’ll happily jump right back into more ambitious meals. But for now, I’m enjoying the simplicity of summer.

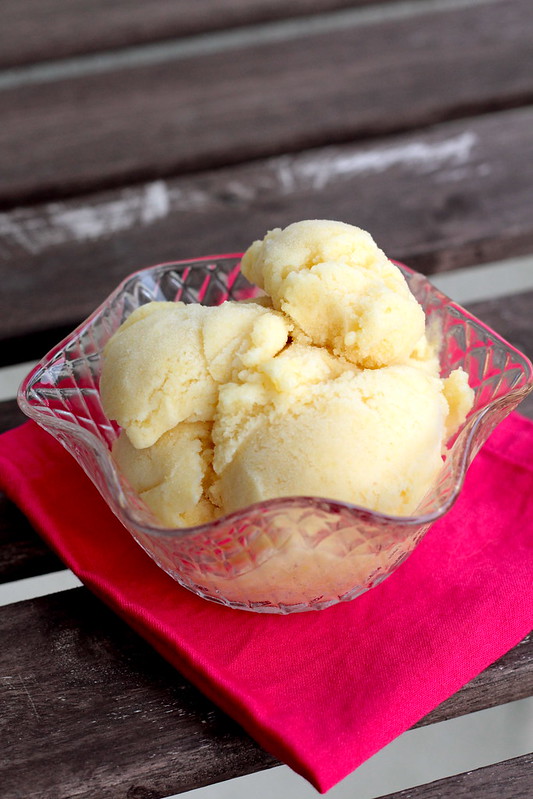
Here’s an easy recipe in honor of yesterday’s National Ice Cream Day: piña colada sherbet that comes together in seconds. (Well, seconds in the food processor and about 30 minutes in your ice cream maker.) With just a handful of ingredients, it epitomizes the simple, laid-back pleasures of summer.

Piña colada sherbet

••••••••••••••••••••••••••••••••••••••••••••••••••••••••••••••••••••••••

Piña Colada Sherbet

  • 1 pineapple, peeled, cored, and chopped (about 4 cups)
  • 1 cup sugar
  • 1 cup unsweetened Thai coconut milk
  • 1 Tbs. dark rum
  • juice of one lime

In a food processor or blender, purée together all ingredients until smooth. Chill the mixture thoroughly in a refrigerator (at least 8 hours), then churn in your ice cream maker according to the manufacturer’s instructions. Serve immediately or transfer to a freezer-safe container and let “ripen” in the freezer for a few hours.

Makes about 1 1/2 quarts.

Source: Very slightly adapted from The Perfect Scoop by David Lebovitz.

Cherry Sorbet

A couple weeks ago we helped a friend paint the walls of his brand-spanking-new condo. Every once in a while I have those “Wow, we’re all grown up now,” moments, and I think it hit me in a strange way while touring that condo. I was genuinely thrilled that Rob had purchased real estate (eek!), but as he showed us around his new place, I suddenly realized that the things I loved most were his ginormous, organized closet and side-by-side refrigerator/freezer.

Yep, I think that puts me firmly in the grownup camp.

I love our apartment, but I can’t stop thinking about that freezer. Imagine being able to store my ice cream maker permanently in the freezer instead of having to shift around piles of frozen veggies every time I wanted to make ice cream! I could have a steady stream of sorbets, fro-yos, and custards without having to plan 24 hours in advance!

On second thought, it’s probably a very good thing I don’t have that freezer.

P.S. I thought it was appropriate to share a sorbet recipe as temperatures climb near 100° this week and we all head to the Great Minnesota Get-Together. Stay cool and hydrated, everyone!

Cherry sorbet

••••••••••••••••••••••••••••••••••••••••••••••••••••••••••••••••••••••••

Cherry Sorbet

  • 2 lbs. bing cherries, pitted and stems removed
  • 1 cup water
  • 3/4 cup sugar
  • 1 tsp. lemon juice
  • 1 tsp. vodka or kirsch

In a medium saucepan, stir together cherries, water, sugar, and lemon juice. Cook over medium heat until the cherries start releasing their juices, and then continue cooking for another 10-15 minutes, or until the cherries are very soft. Remove from heat and let cool to room temperature.

Stir in vodka and puree cherries in a blender until smooth (I use my stick blender so I don’t have to dirty another dish). Cover and chill for at least eight hours, and then freeze in your ice cream maker according to manufacturer’s instructions.

Makes approximately 1 quart.

Source: Very slightly adapted from The Perfect Scoop.